Set up a small, comfortable workspace
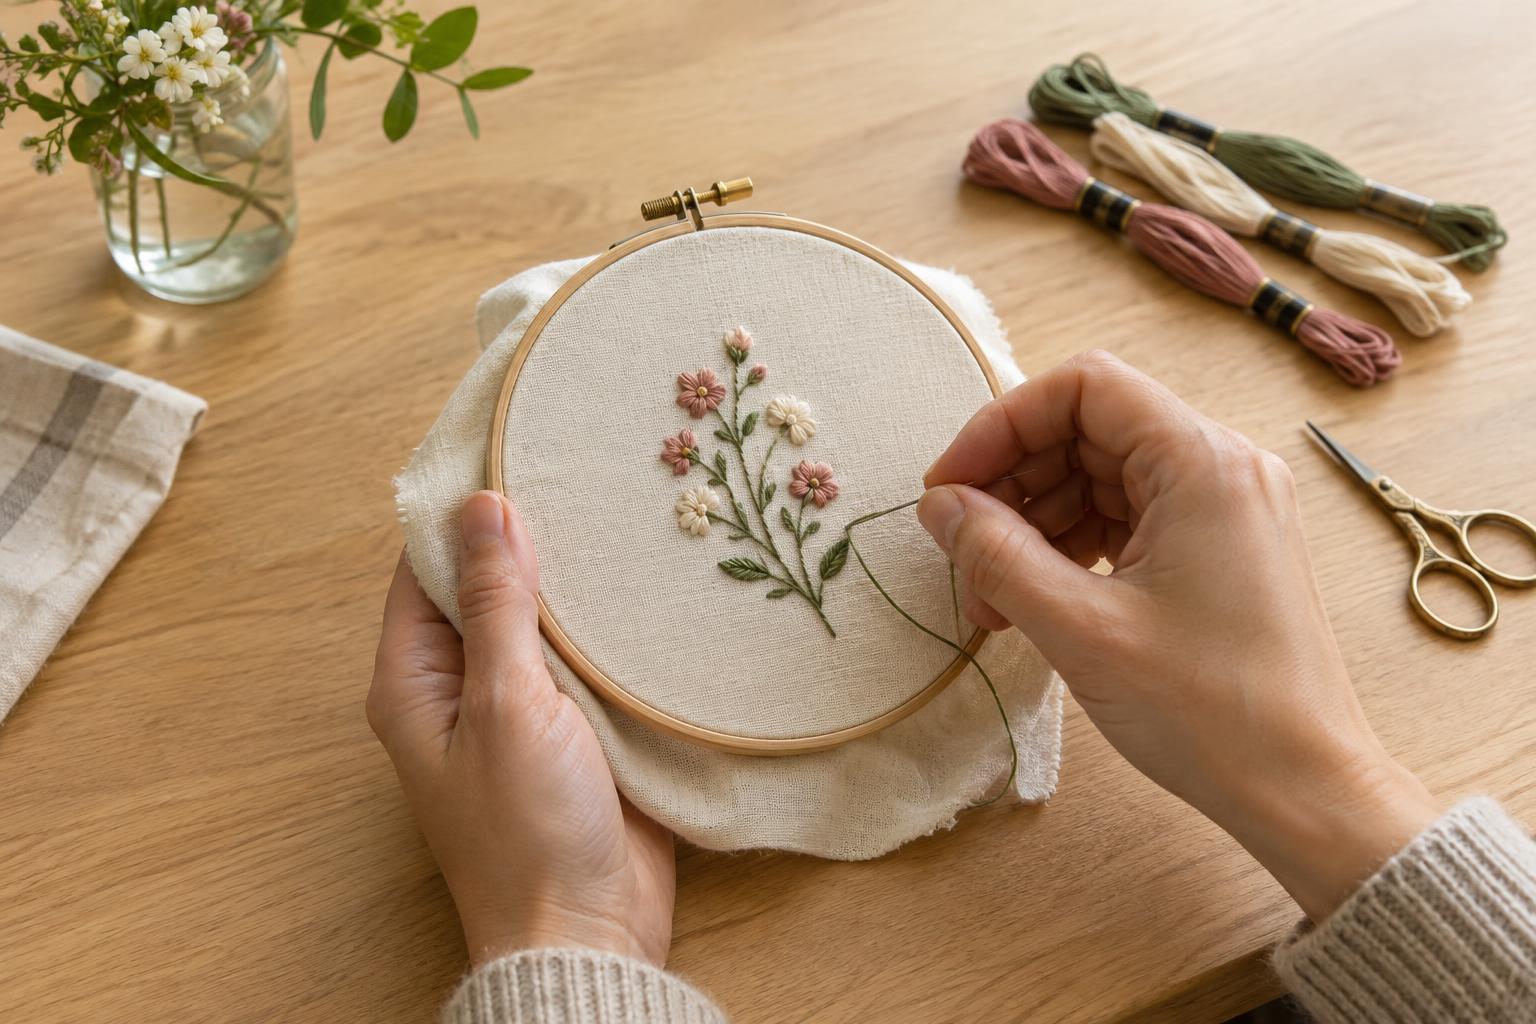
Embroidery is easier to learn when the project is small enough to finish without rushing. For this first piece, you will stitch a little sprig with a curved stem, two leaves and a few dots of color. It gives each stitch a purpose while leaving plenty of room for uneven lines and changes of mind.
Gather a square of plain, tightly woven cotton about 15 centimeters across, a small embroidery hoop, an embroidery needle, embroidery floss, scissors and a pencil or washable fabric marker. Choose two or three floss colors that you like together. If you are using a pencil, draw lightly; marks outside your stitching may remain visible. Keep the design near the center of the fabric so the hoop has room to grip it.
Separate two or three strands from a length of floss and thread them through the needle. Shorter lengths are less likely to tangle; roughly the distance from your fingertips to your elbow is plenty. Place the fabric in the hoop and tighten it until it feels smooth and gently taut, not stretched out of shape. You can readjust the fabric whenever it starts to loosen.
Practice three stitches before starting the design
Make a few practice marks near the edge of the fabric, where you can trim them away or leave them hidden by a frame. To begin, bring the needle up from the back and leave a short tail underneath. Hold that tail in place for your first couple of stitches so the thread catches it. Another beginner-friendly option is a small knot on the back.
Running stitch is a line of separate dashes. Bring the needle up, put it down a short distance away, then bring it up again after another small gap. Try to keep the dashes similar in length, but do not worry about making them identical. This stitch works well for a light decorative border or scattered accents.
Backstitch makes a more continuous line. Bring the needle up one stitch-length ahead on your drawn line, then put it down at the end of the previous stitch. Bring it up another stitch-length ahead and repeat, working back into the last hole each time. For satin stitch, fill a small shape with side-by-side straight stitches. Bring the needle up at one edge and down at the opposite edge, then repeat beside the last stitch. Small leaves are easier to fill neatly than large shapes.
Stitch a simple sprig
Draw a gently curving stem about 6 centimeters long in the center of the fabric. Add one narrow leaf on each side, each about 1 to 1.5 centimeters long, and three small dots above the tip. The drawing is a guide rather than a rule: if you would rather make one leaf larger or move a dot, do so before stitching.
Start with the stem in backstitch. Follow the curve with short stitches, turning the fabric in your hands as needed instead of forcing the needle into an awkward angle. A few slightly different stitch lengths can help the line follow the bend. At the end, turn the hoop over and pass the needle under several nearby stitches to secure the thread. Trim the excess without cutting the stitches themselves.
Switch colors for the leaves. Fill each one with satin stitch, working from one side of its outline to the other. If the edges look jagged, you can add a fine backstitched outline, but it is optional. For the dots, make two or three tiny straight stitches close together at each marked spot. Add a loose running-stitch line below the sprig if you want to practice that stitch in the finished piece.
Finish without chasing perfection
When the stitching is done, secure the final thread on the back and remove the fabric from the hoop. If you used a washable marker, follow its removal directions before displaying the piece. If the fabric is creased, press it carefully from the back with a cloth between the embroidery and the iron, taking care not to flatten the raised stitches.
You can place the fabric back in the hoop as a simple display, or keep it as a practice sample. If you display it in the hoop, trim the fabric only after deciding how you want to secure the extra material at the back. Leaving a generous margin gives you more options than cutting close to the stitches right away.
Look at what you learned rather than at every uneven gap. If the floss twisted, let the needle hang briefly so it can unwind. If the fabric puckered, try gentler thread tension next time: pull each stitch until it rests against the fabric, not until the fabric gathers. A second small sprig is a useful next project because you can change one thing at a time, such as your stitch length, leaf shape or colors.